Ubuntu 16.04 LTSの問い合わせが増えてきているため、Ubuntu 16.04 LTSのダウンロード、インストール、起動までの手順を分かりやすく解説します。
解説環境
VMware ESXi 6.5 ホストに仮想マシンを作成して、下記OSをインストール。
・Ubuntu 16.04 LTS Server
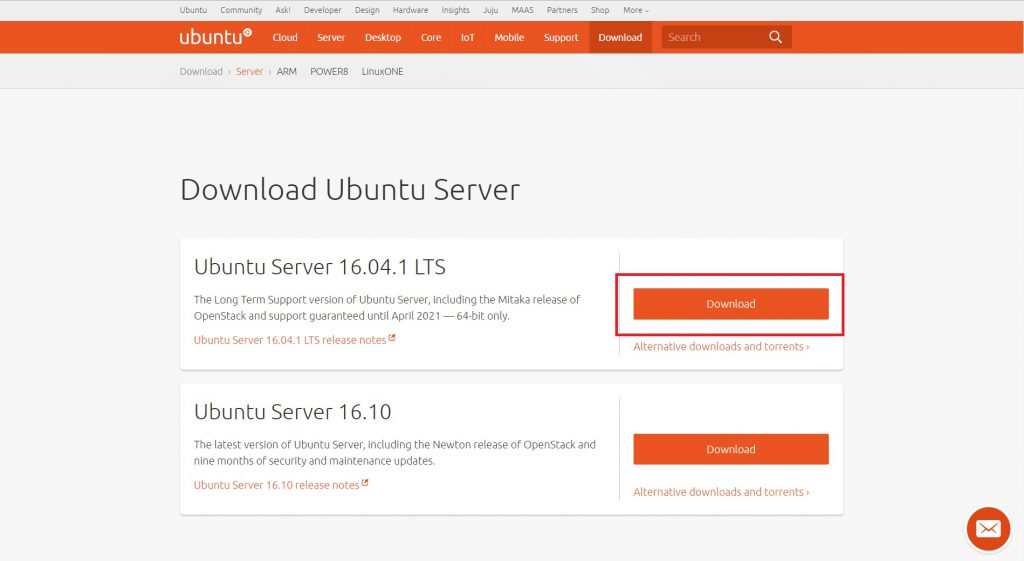
Ubuntu 16.04 LTS Serverをダウンロードする
https://www.ubuntu.com/download/server にアクセスして、Ubuntu 16.04 LTS ServerのISOファイルをダウンロードします。
Ubuntu 16.04 LTS Serverをインストールする
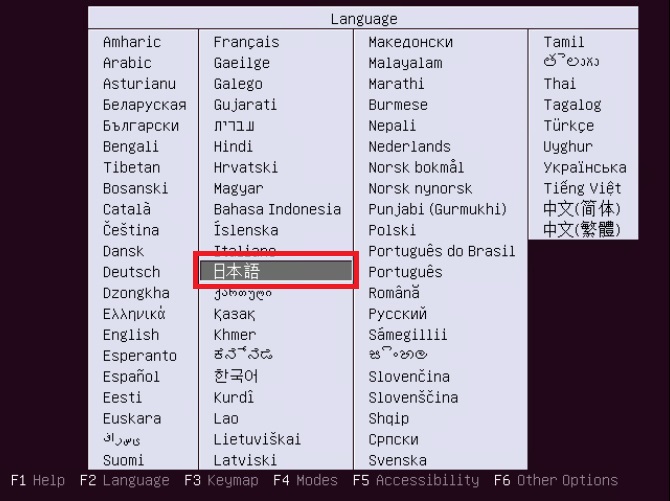
ダウンロードしたISOファイルでマシンを起動すると、インストール設定が始まります。
Languageは、[日本語]を選択します。
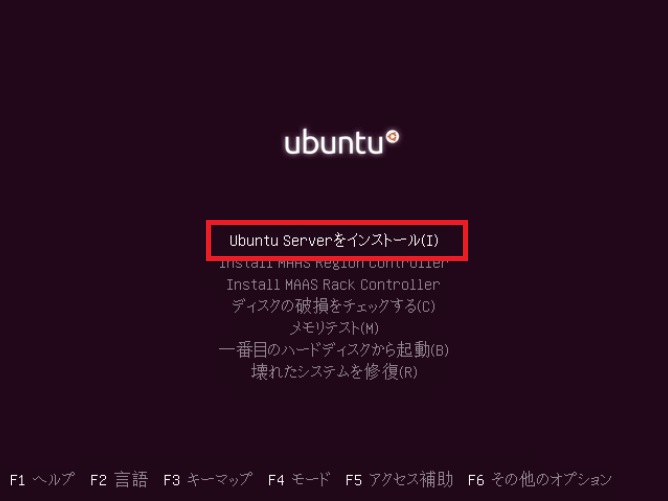
[Ubuntu Serverをインストール(I)]を選択します。
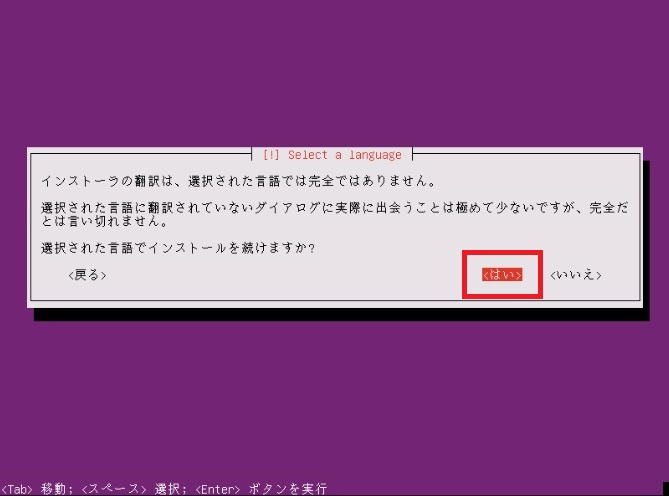
確認メッセージが出ますが、[はい]を選択。
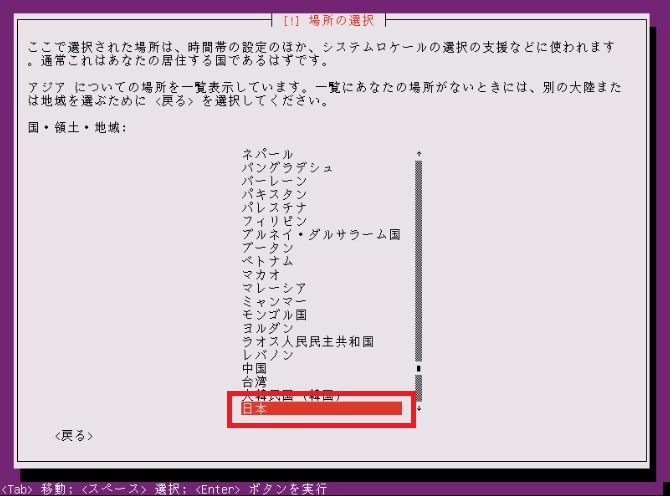
国・領土・地域は[日本]が選択されている事を確認してエンター。
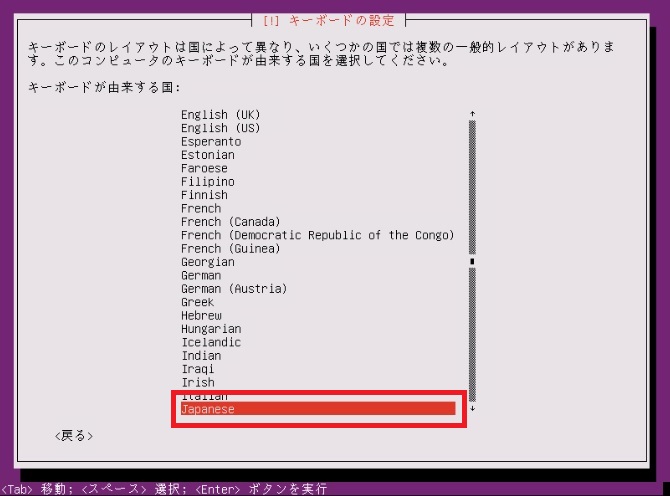
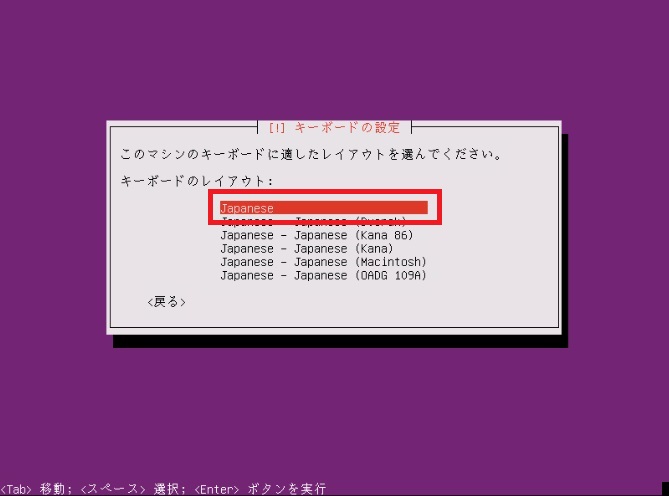
キーボードは[Japanese]が選択されている事を確認してエンター。
キーボードのレイアウトは、[Japanese]が選択されていることを確認してエンター。
しばらく待ちます。

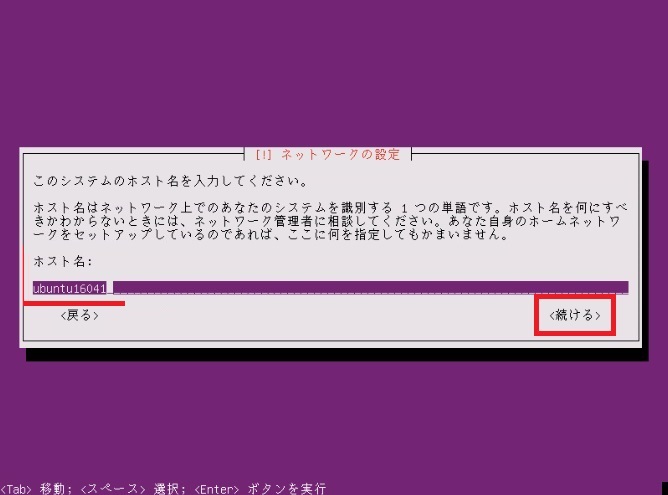
Serverの[ホスト名]を入力ます。
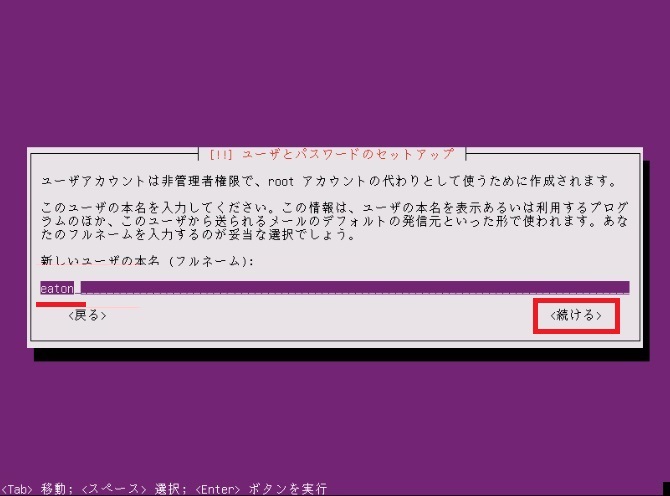
ユーザーの本名(フルネーム)を求められます。この次の画面で入力する[アカウント名]と同じで良いでしょう。
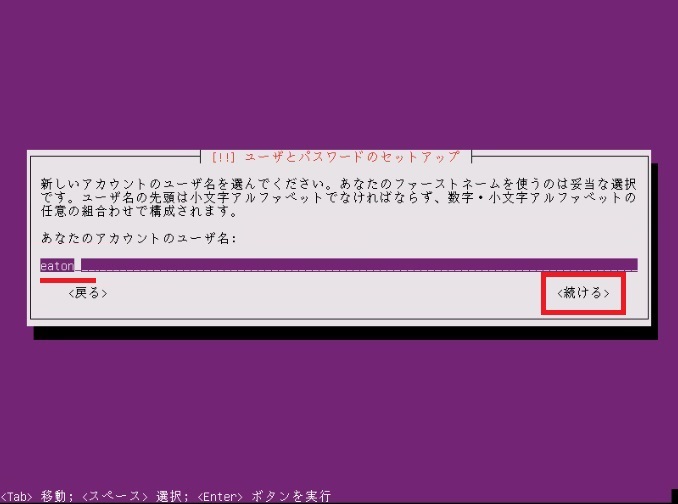
サーバにログインする[アカウント名]を入力します。
作成するアカウントの[パスワード]を入力します。
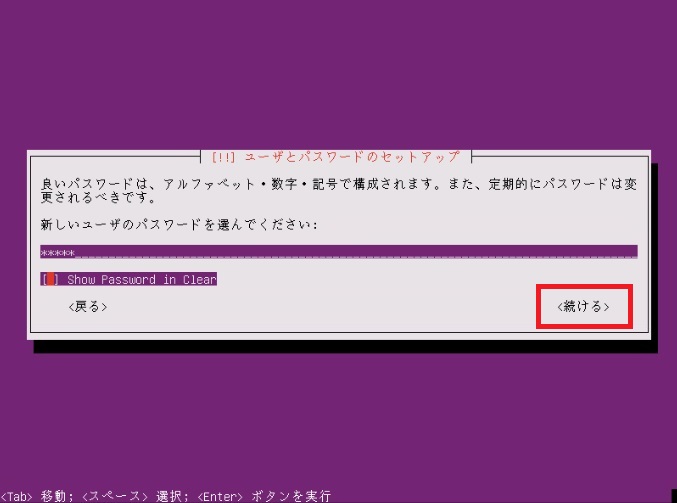
確認のため、再度[パスワード]を入力します。

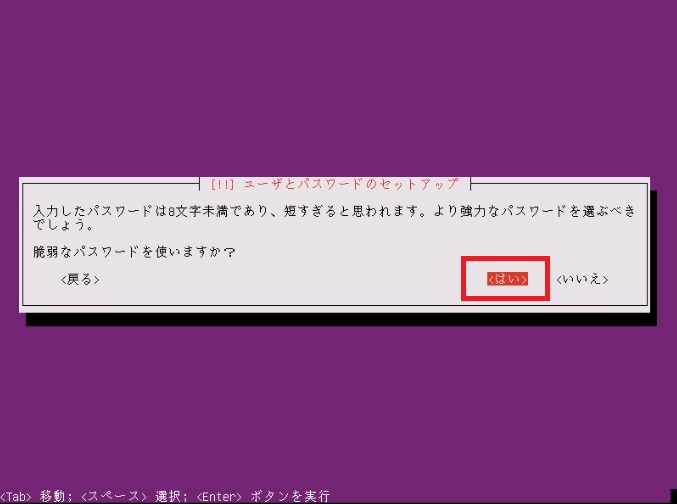
脆弱なパスワードを入力していると[警告]が出ます。
検証環境のため、ここでは[はい]を選択しています。実環境の場合、セキュリティの観点から[強力なパスワード]を設定される事を推奨します。
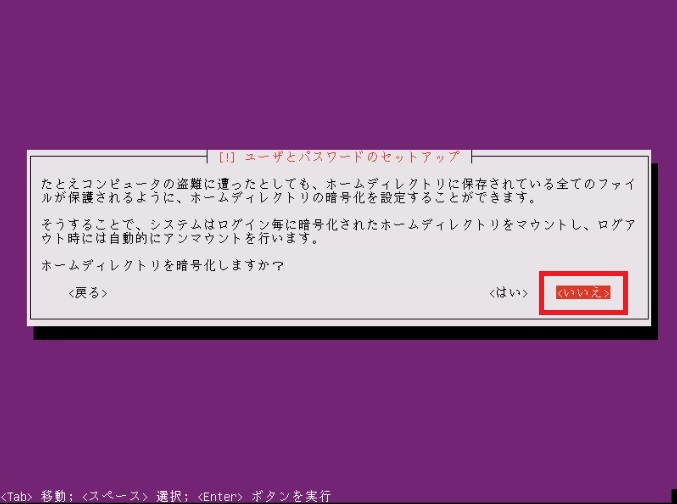
ホームディレクトリを暗号化するかの[確認]が出ます。
検証環境のため、ここでは[いいえ]を選択しています。実環境の場合、セキュリティの観点から[はい]を選択される事を推奨します。
タイムゾーンが[Asia/Tokyo]で合ってますか?と確認されるので、[はい]を選択します。

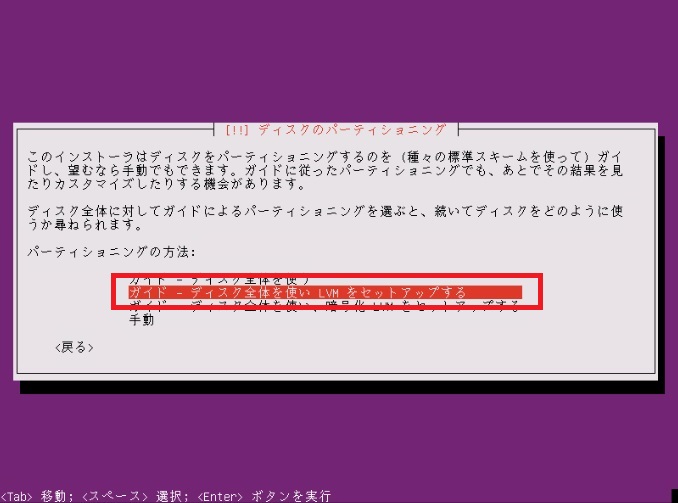
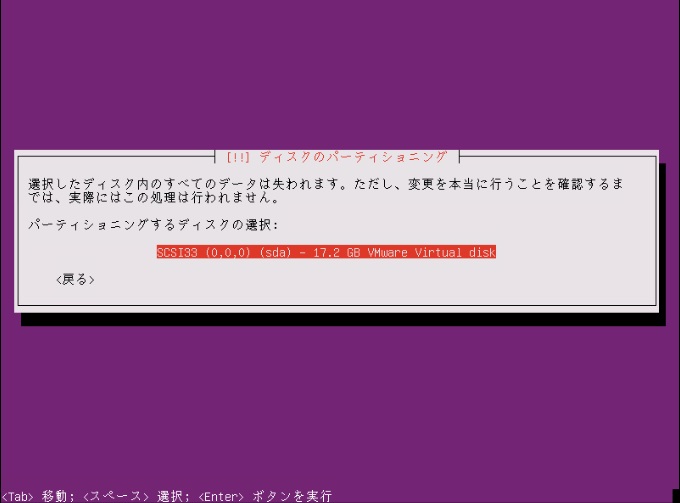
ディスクのパーティションについて聞かれます。[任意のパーティショニング]を選択してください。
ここから、[ディスク全体を使い LVM をセットアップする]を選択した解説になります。
パーティションを変更する[ディスク]を選択します。
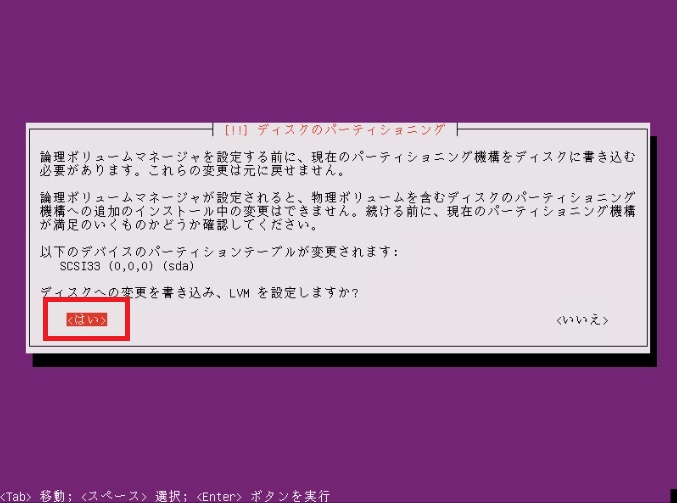
ディスクへのパーティション変更を書き込み、LVMを設定しますか?の確認です。
[はい]を選択します。
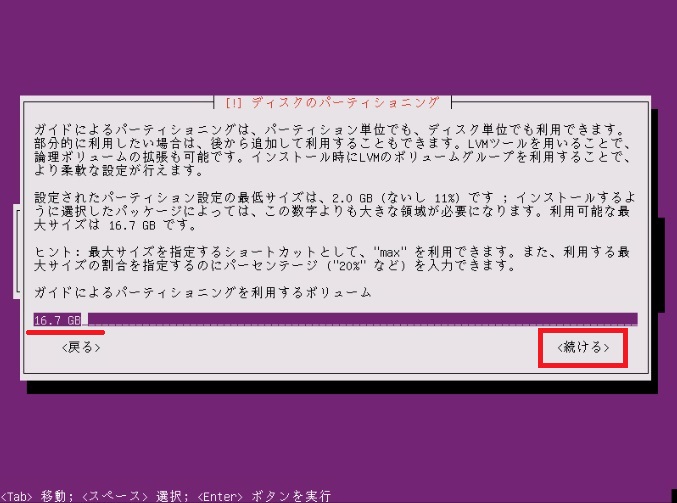
ディスク全体の容量のうち、どれだけボリュームを割り当てるかの確認です。
ここでは、ディスク最大領域を割り当てています。
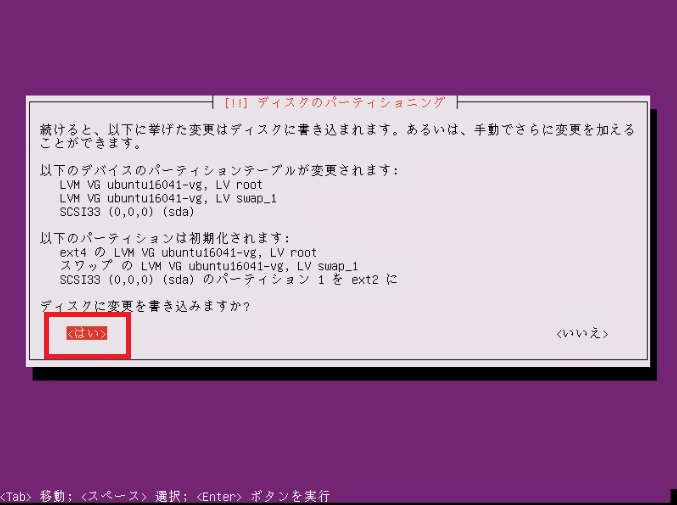
パーティショニングの最終確認です。
[はい]を選択します。
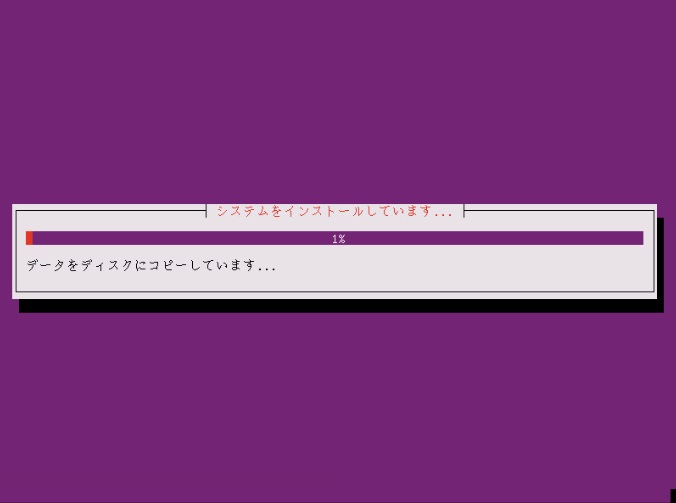
システムのインストールが始まります。しばらく待ちます。
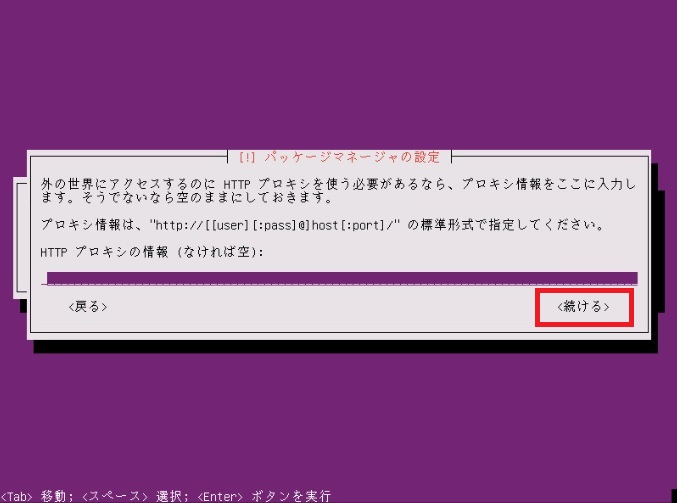
プロキシサーバがあれば入力します。なければ、空欄のままにします。
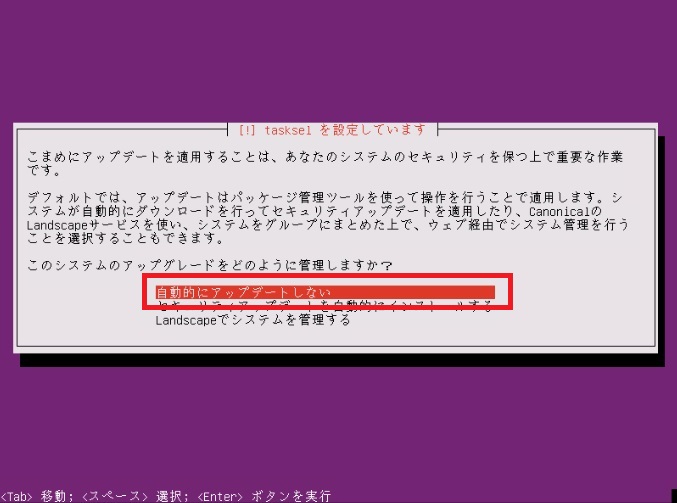
アップデート確認を一覧の中から[任意選択]します。
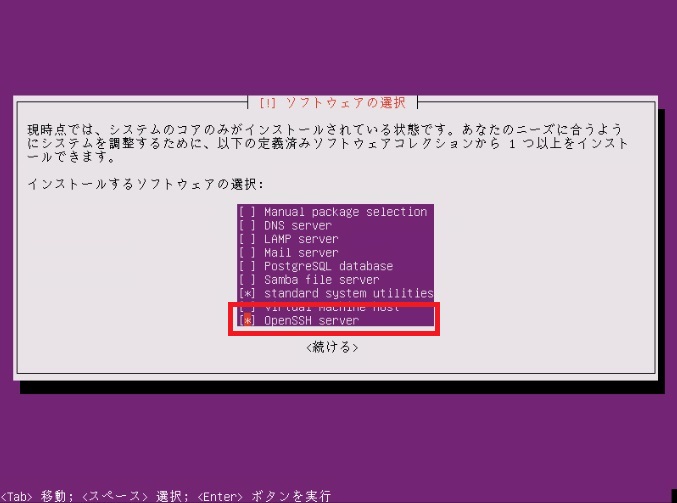
Ubuntu Server の役割を選択します。
TeraTermなどのターミナルソフトから、SSH接続する事を想定して[OpenSSH Server]はチェックしておいたほうが良いでしょう。
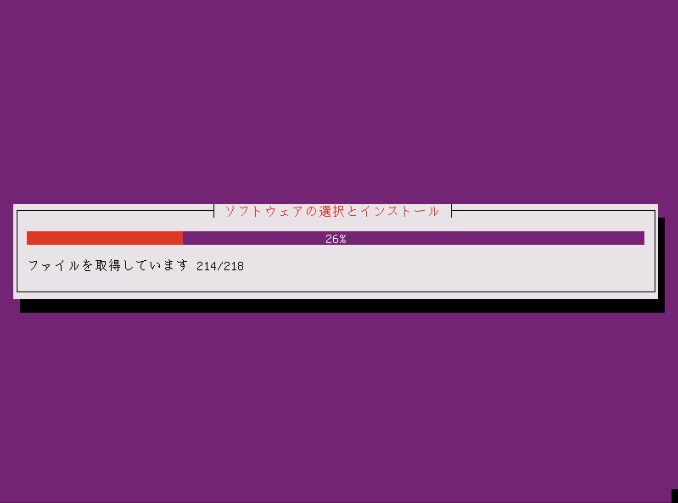
ソフトウェアのインストールが始まります。しばらく待ちます。
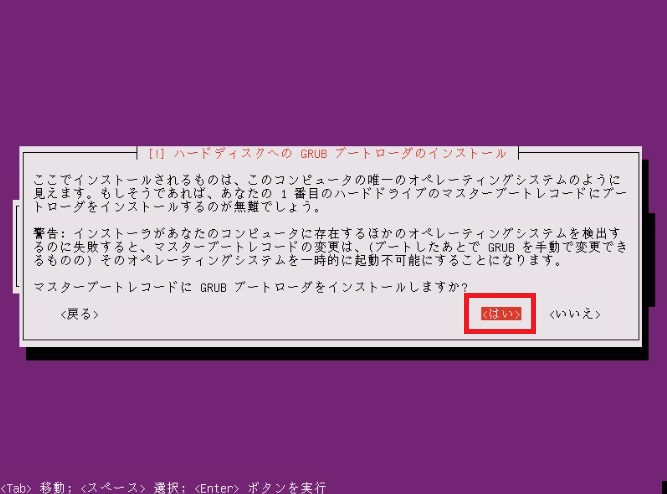
GRUBブートローダのインストール確認は、[はい]を選択します。
インストールが完了しました。[続ける]を押すとマシンが再起動します。
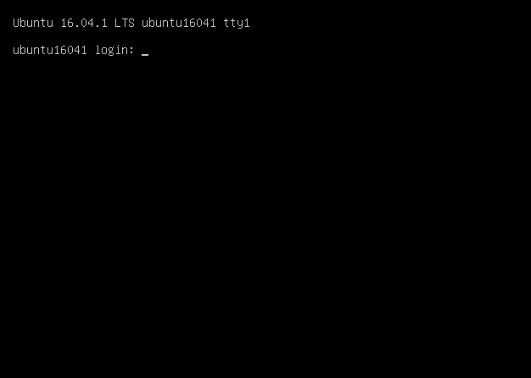
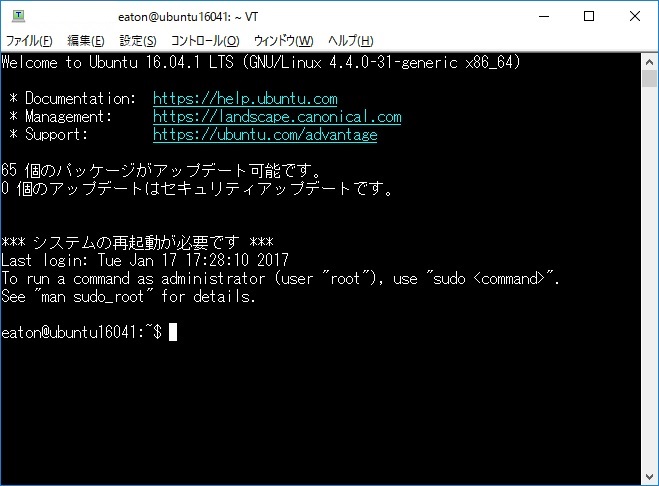
Ubuntu 16.04 LTS Server 起動確認
Ubuntu 16.04 LTS Serverがインストールされた事が確認できます。
インストール時に作成した[アカウント]でログインします。
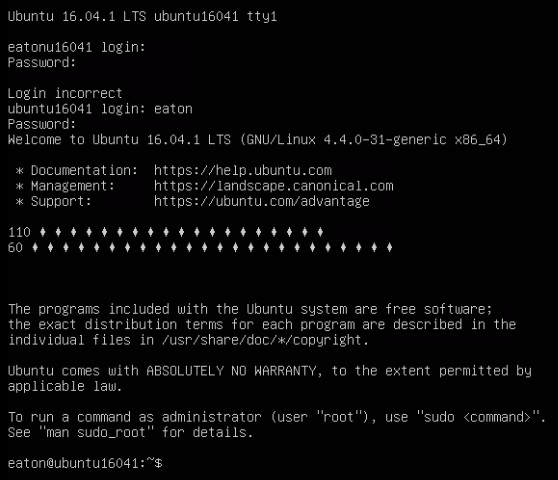
OpenSSH Serverをインストールした場合は、TeraTerm等のターミナルソフトでSSH接続の確認もしましょう。
最後に
最後までお付き合い頂きまして、ありがとうございました。
Eaton UPS管理ソフトウェアIPPは、Ubuntu Server 16.04 LTS に対応しております。
Ubuntuの電源保護は、Eaton UPSをご検討ください。
以上、村田@ダイトロンがお届けしました。